GIS
CesiumJS을 사용하여 3D 건축물 세워보기

728x90
안녕하세요. 팀드모네입니다.
오늘은 CesiumJS을 사용하여 3D 건축물을 세워보겠습니다.

그나저나.. 어째서 프로그램 이름이 세슘일까요. 살모사나 독화살개구리 뭐 이런거면 어감도 귀엽도 참 좋을텐데요..
세슘하니까 후쿠시마 수산물이 생각나네요.
아무튼, 각설하고 바로 코드 공개드립니다.
1. html 생성
파일명 : 3d_building.html
<!DOCTYPE html>
<html lang="en">
<head>
  <meta charset="utf-8">
  <!-- Include the CesiumJS JavaScript and CSS files -->
  <script src="https://cesium.com/downloads/cesiumjs/releases/1.79.1/Build/Cesium/Cesium.js"></script>
  <link href="https://cesium.com/downloads/cesiumjs/releases/1.79.1/Build/Cesium/Widgets/widgets.css" rel="stylesheet">
  <style type="text/css">
    #toggle-building { z-index: 1; position: fixed; top: 5px; left: 5px; }
  </style>
</head>
<body>
  <div id="cesiumContainer"></div>
  <button id="toggle-building">Toggle new building</button>

  <script>
    // Get your token from https://cesium.com/ion/tokens
    Cesium.Ion.defaultAccessToken = 'your_token_here';

    // Keep your Cesium.Ion.defaultAccessToken = 'your_token_here' line from above.
    // STEP 2 CODE
    // Initialize the viewer with Cesium World Terrain.
    const viewer = new Cesium.Viewer('cesiumContainer', {
      terrainProvider: Cesium.createWorldTerrain()
    });
    // Add Cesium OSM Buildings.
    const buildingsTileset = viewer.scene.primitives.add(Cesium.createOsmBuildings());
    // Fly the camera to Denver, Colorado at the given longitude, latitude, and height.
    viewer.camera.flyTo({
      destination: Cesium.Cartesian3.fromDegrees(-104.9965, 39.74248, 4000)
    });

    // STEP 3 CODE
    async function addBuildingGeoJSON() {
      // Load the GeoJSON file from Cesium ion.
      const geoJSONURL = await Cesium.IonResource.fromAssetId(your_asset_id_1);
      // Create the geometry from the GeoJSON, and clamp it to the ground.
      const geoJSON = await Cesium.GeoJsonDataSource.load(geoJSONURL, { clampToGround: true });
      // Add it to the scene.
      const dataSource = await viewer.dataSources.add(geoJSON);
      // By default, polygons in CesiumJS will be draped over all 3D content in the scene.
      // Modify the polygons so that this draping only applies to the terrain, not 3D buildings.
      for (const entity of dataSource.entities.values) {
        entity.polygon.classificationType = Cesium.ClassificationType.TERRAIN;
      }
      // Move the camera so that the polygon is in view.
      viewer.flyTo(dataSource);
    }
    addBuildingGeoJSON();

    // STEP 4 CODE
    // Hide individual buildings in this area using 3D Tiles Styling language.
    buildingsTileset.style = new Cesium.Cesium3DTileStyle({
      // Create a style rule to control each building's "show" property.
      show: {
        conditions : [
          // Any building that has this elementId will have `show = false`.
          ['${elementId} === 532245203', false],
          ['${elementId} === 332469316', false],
          ['${elementId} === 332469317', false],
          ['${elementId} === 235368665', false],
          ['${elementId} === 530288180', false],
          ['${elementId} === 530288179', false],
          // If a building does not have one of these elementIds, set `show = true`.
          [true, true]
        ]
      },
      // Set the default color style for this particular 3D Tileset.
      // For any building that has a `cesium#color` property, use that color, otherwise make it white.
      color: "Boolean(${feature['cesium#color']}) ? color(${feature['cesium#color']}) : color('#ffffff')"
    });

    // STEP 6 CODE
    // Add the 3D Tileset you created from your Cesium ion account.
    const newBuildingTileset = viewer.scene.primitives.add(
      new Cesium.Cesium3DTileset({
        url: Cesium.IonResource.fromAssetId(your_asset_id_2)
      })
    );
    // Move the camera to the new building.
    viewer.flyTo(newBuildingTileset);

    // STEP 7 CODE
    // Toggle the tileset's show property when the button is clicked.
    document.querySelector('#toggle-building').onclick = function() {
      newBuildingTileset.show = !newBuildingTileset.show;
    };
  </script>
</body>
</html>
토트리얼 코드에서 좀 오류가 있어서 제가 수정한 부분이 있습니다.
모국어가 한국어라면 아쉽지만 <meta charset="utf-8">를 꼭 기술해야합니다. 기술하지 않으면, 굳이 시간 들여 해결하고 싶지 않은 에러가 발생합니다. 혹시 위 코드를 동작시키려면, your_token_here, your_asset_id_1, your_asset_id_2에 값을 넣으셔야 합니다.
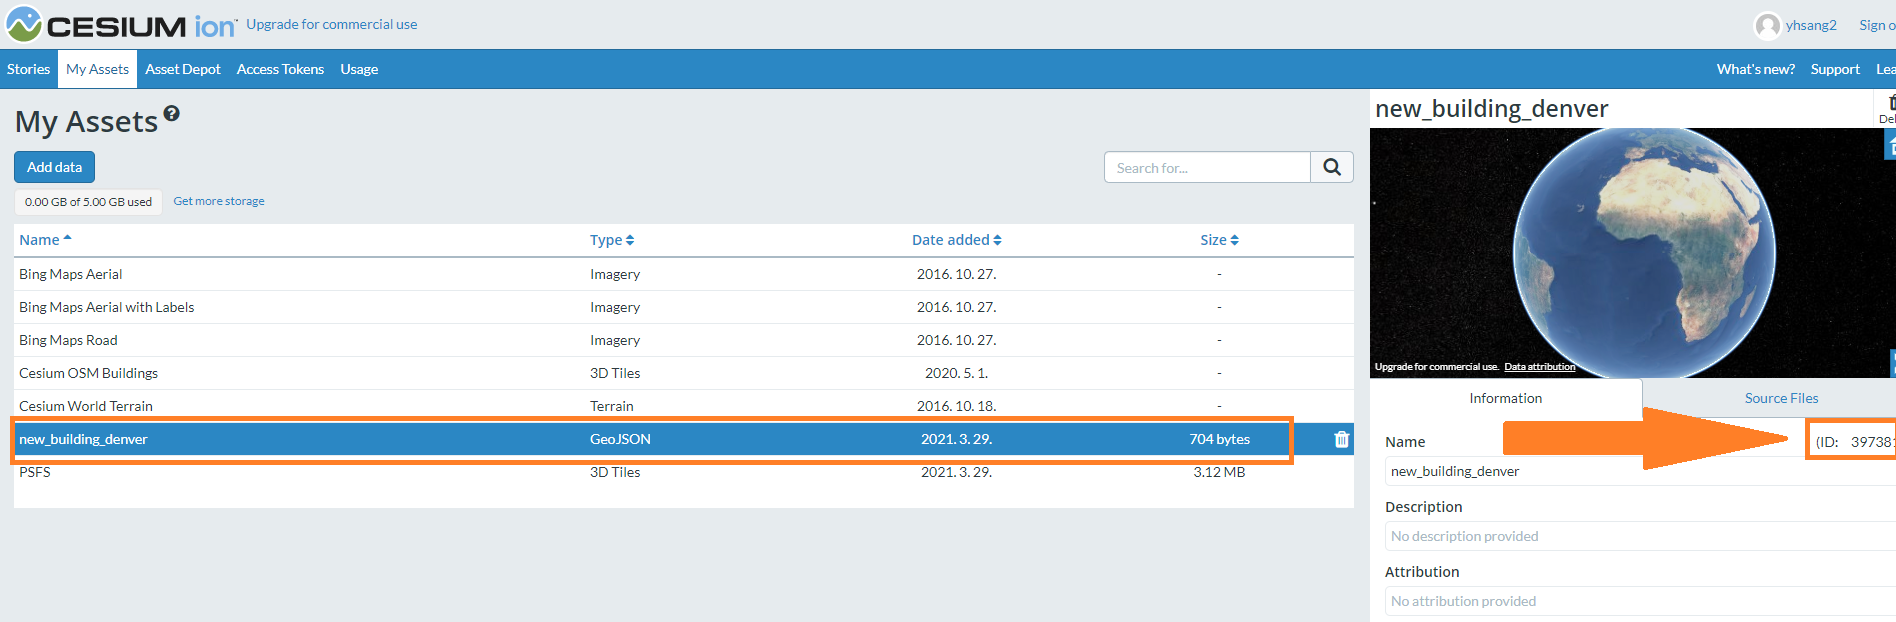
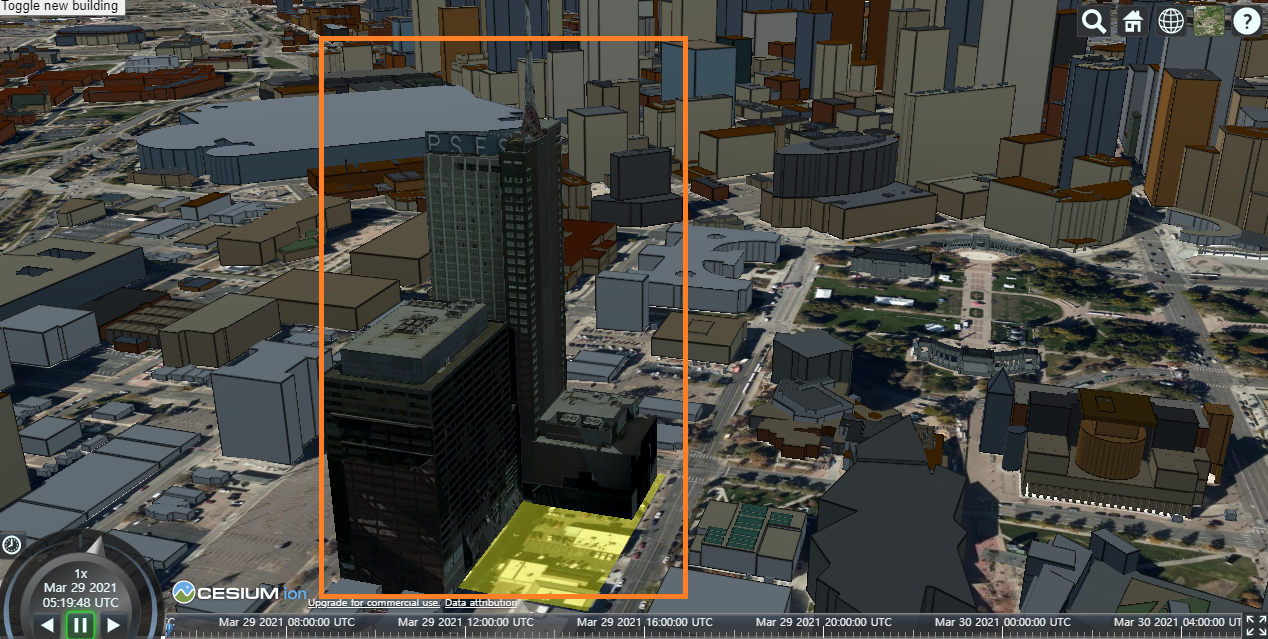
your_token_here은 토큰으로 cesium.com/ion/tokens 에서 발급하시면 되고.. your_asset_id_1은 새 건물을 추가하기 전에 영역을 표시하는 용도로 사용됩니다. 아래 파일을 다운받아 cesium.com/ion에 업로드하시면 id값을 발급받을 수 있습니다. 아래 사진을 참고해주세요.
new_building_denver.geojson
0.00MB
your_asset_id_2는 3D 모델 건물 (3D 타일로 타일)이고
cesium.com/ion에 아래 파일을 다운받아 업로드하시면 id값을 발급받을 수 있습니다.
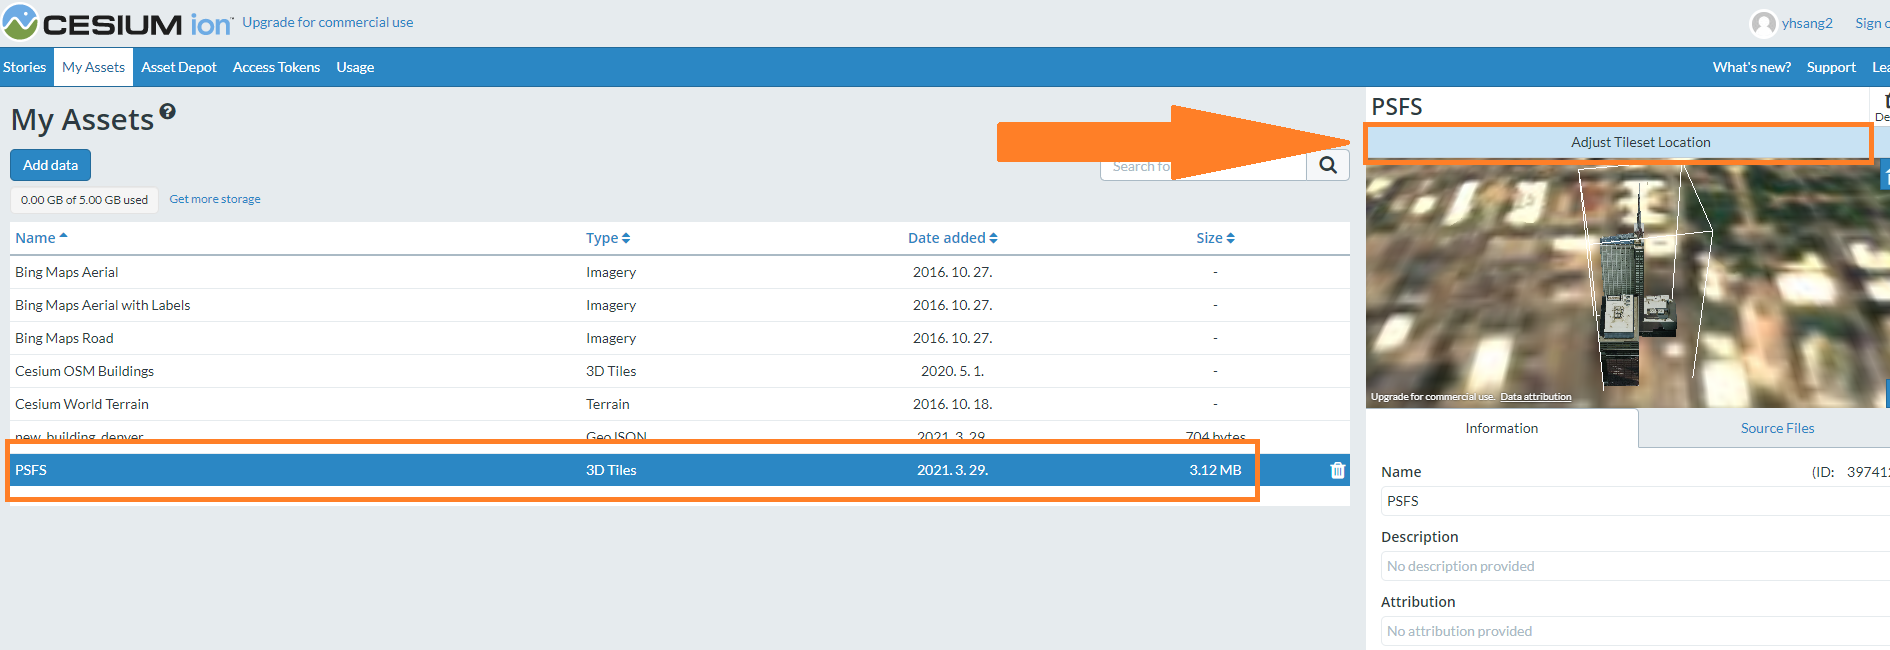
업로드 하신 후 Adjust tileset location 버튼을 클릭해주세요.
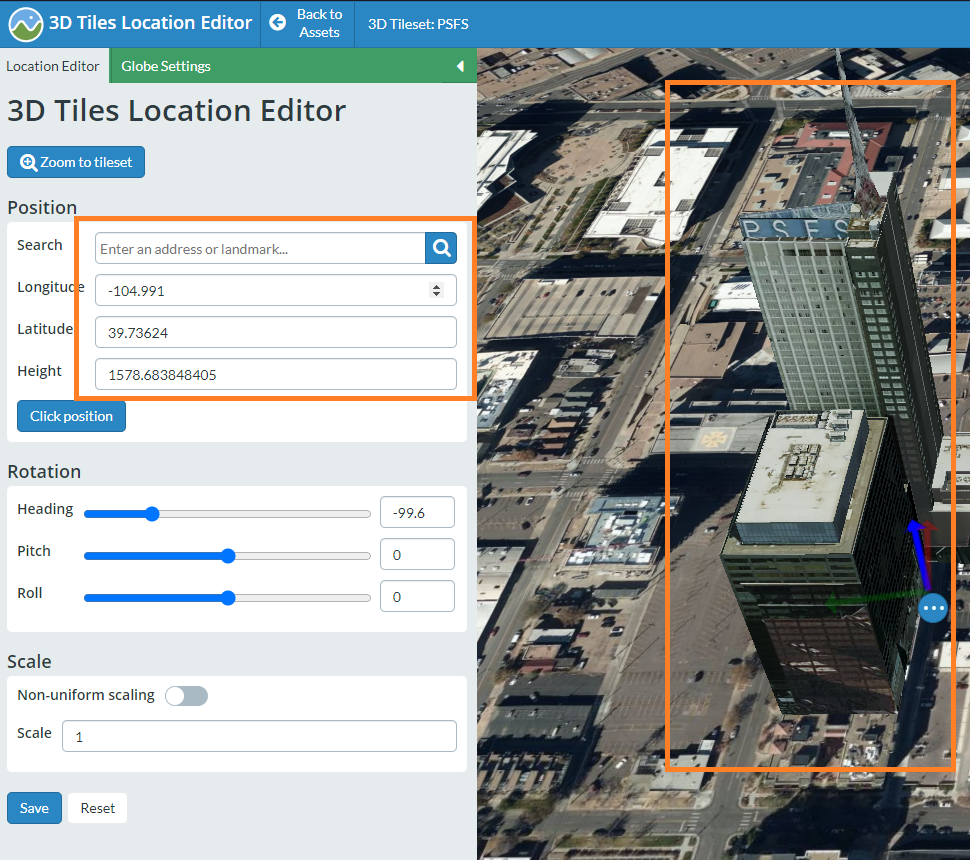
위 사진을 참고하여 세팅해주세요.
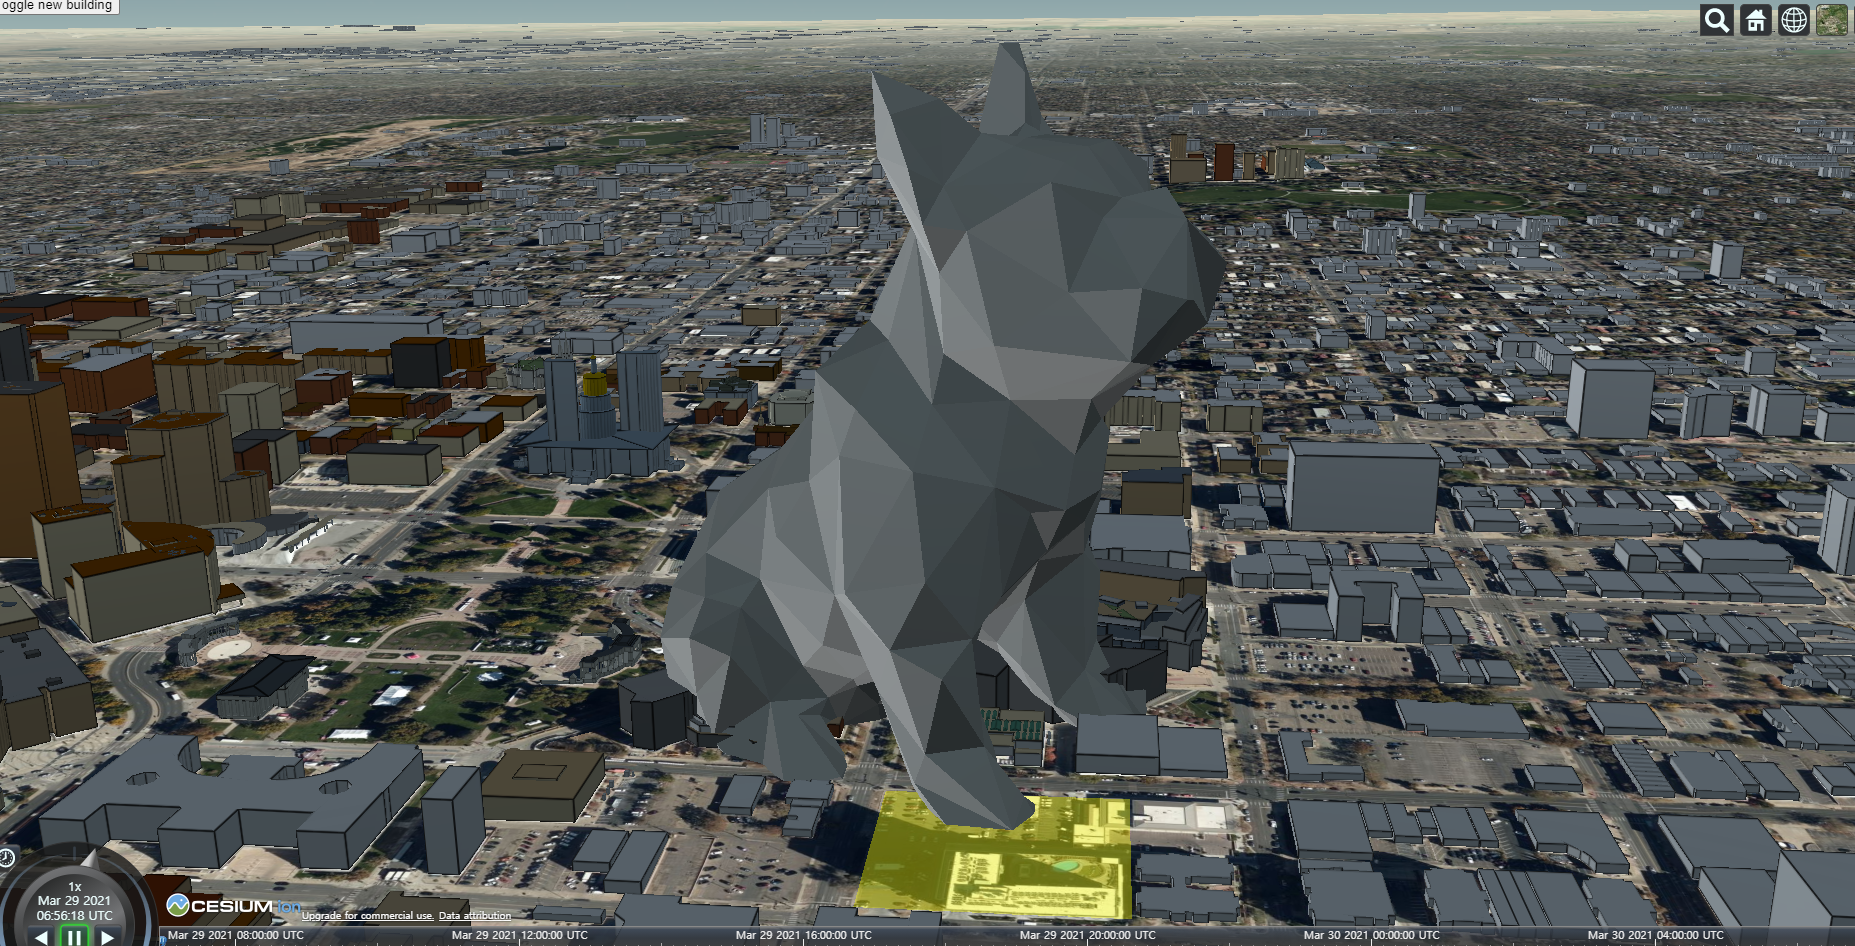
2. 결과 확인
저희가 업로드하였던 3D 건축물이 지도 위에 출력된 것을 확인할 수 있습니다.
위 내용을 조금 응용하면 '자르에어불 스피커'도 출력할 수 있습니다.

추가로 CesiumJS의 명명 어원은 원자 시계라고 하네요. 세슘원자시계는 세슘(Cs)이라는 원자가 내보내는 진동수를 기준으로 시간을 나타내는 것으로 국제표준 시간이라고 합니다. 세슘JS도 원자시계처럼 GIS를 정확하게 표현하고 싶다! 그런 의지에서 이렇게 명명하였다고 합니다.

블로그 방문해주셔서 감사합니다.
추가로 질문사항이 있으면 댓글 남겨주세요 :)
reference : cesium.com/about/
광고 링크 : https://ogx4.com
인공지능이 추천하는 10개의 게임!
보물처럼 숨겨진 게임을 발굴하자! 게이머엑스포 유저들은 누구나 게임 발굴 대회에 참여 가능합니다. 게임 발굴 대회에서 입상한 게임은 2023 에디터 추천 TOP100에 노출됩니다. 단순 조회, 게임
ogx4.com
반응형
'GIS' 카테고리의 다른 글
| [QGIS] 라인의 버텍스에 라인을 그리는 방법 (0) | 2022.07.11 |
|---|---|
| 캐디안 프로그램에서 .NET dll 로드 방법 (0) | 2021.05.20 |
| CesiumJS 사용법 간단 안내 (0) | 2021.03.29 |
| Example of an OpenLayer marker output (0) | 2021.01.20 |
Contents
소중한 공감 감사합니다